内 核 版 本:linux-3.0
u-boot版本:u-boot-2010.09
开发板型号:FL2440

我们在上面移植了 initramfs 文件系统,并且已经成功运行了。下面我们开始移植nfs,之前开启PC 上的nfs 服务功能
确认并安装 NFS 服务依赖软件包。
在使用 NFS 共享文件之前,我们首先使用rpm 命令确认我们安装了这些应用程序。如果没有安装,则从安装光盘中找到他们并安装,或者使用
yum 安装。下面显示我们在安装系统时,已经选择安装了NFS 服务相关软件。

1、修改主机上的 NFS 配置文件,导出/home/lingyun/keyue目录使用NFS 共享:
[lingyun@localhost keyue]$ sudo vim /etc/exports

重新启动 rpcbind 或portmap 和nfs 服务

使用 root 权限运行“service nfs restart”命令重启NFS 服务,让其生效:

使用service rpcbind status 命令和“service nfs status”命令查看相关服务的运行状态,同时可以使用“showmount –e”命令可以查看我们通过NFS 服务
共享的文件:

测试 NFS 访问
[lingyun@localhost keyue]$ mkdir /mnt/ky-nfs/
[lingyun@localhost keyue]$ mount -t nfs 192.168.1.3:/home/lingyun/keyue /mnt/ky-nfs/
[lingyun@localhost keyue]$ mount
这里我们先假定 PC 上的功能已经开启,同时在上面移植initramfs 文件系统时也完成了下面添加内核对nfs 的支持的前提下,我们先在上面
已经运行起来的环境中试着先看看开发板上的nfs 客户端功能是否支持:
PC下/home/lingyun/keyue下的文件如下:
注:/home/lingyun/keyue为挂载的目录。

开发中挂载 PC 上的/home/lingyun/keyue下的文件如下

由此可见,开发板和PC上的NFS服务已经启动。
2、对根文件系统进行修改
无修改
3、添加内核对 nfs 的支持
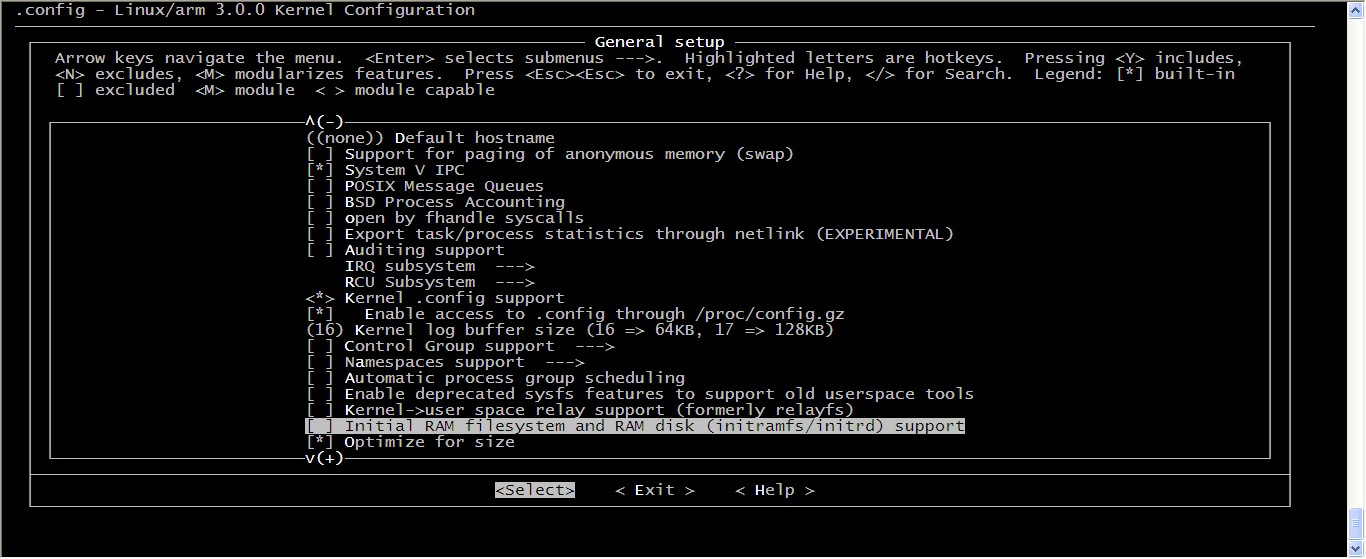
关掉上面的 initramfs 功能
General setup --->
开启 nfs 功能
Networking --->
Networking options --->
File systems --->
Network File Systems --->

修改Makefile
[lingyun@localhost linux-3.0]$ vim Makefile
修改195、196行

编译[lingyun@localhost linux-3.0]$ make
编译过程省略
[lingyun@localhost linux-3.0]$ ls
显示目录结果同移植(一)。
ky-nfs.bin为编译好的内核。
4 制作映像文件
因为文件系统和内核是集成在一起的,所以不需要制作文件系统映像
5 将文件系统烧入开发板
5.1 设置启动参数
[u-boot@keyue]# set bootcmd_rootfs 'nand read 30008000 100000 400000;bootm 30008000'
[u-boot@keyue]# set bootcmd 'run bootcmd_rootfs'
[u-boot@keyue]# set bootargs 'noinitrd console=ttyS0,115200 init=/linuxrc mem=64M loglevel=7 root=/dev/nfs rw nfsroot=192.168.1.3:/home/lingyun/keyue/rootfs_tree ip=192.168.1.111:192.168.1.3:192.168.1.1:255.255.255.0:localhost.com:eth0:off '
[u-boot@keyue]# set bootargs_nfs 'noinitrd console=ttyS0,115200 init=/linuxrc mem=64M loglevel=7 root=/dev/nfs rw nfsroot=192.168.1.3:/home/lingyun/keyue/rootfs_tree ip=192.168.1.111:192.168.1.3:192.168.1.1:255.255.255.0:localhost.com:eth0:off '
[u-boot@keyue]# set bkr 'tftp 30008000 ky-nfs.bin;nand erase 100000 400000;nand write 30008000 100000 400000'
[u-boot@keyue]# save

启动参数保存成功。
5.2 将内核和文件系统烧入开发板
[u-boot@keyue]# run bkr

[u-boot@keyue]#boot
烧录的过程省略,结果如下:

至此,文件系统已经烧入开发板,可以看到自己制作的文件系统。


 控制系统计算机辅助设计 — MATLAB语言与应用
 LM118J-8PQMLV


 京公网安备 11010802033920号